

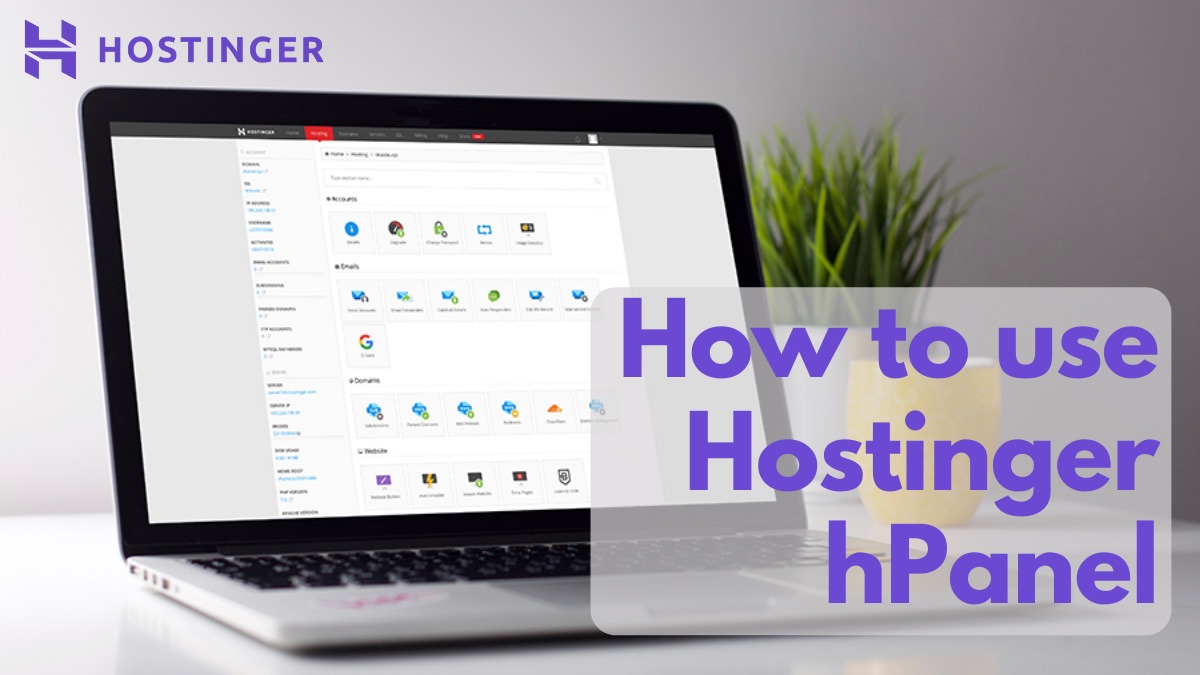
Hostinger is one of the best web hosting with cheap prices and deals. Its prices are starting from just $0.99/mon if you get 4-year web hosting package. It was founded in 2004 and hosted 29 million websites in 178 countries. Its loading time is best that is 350 ms and uptime is 99.95%. Read more about Hostinger. If you are new in the website community than Hostinger should be your first preference. Its cPanel is called Hostinger hPanel.
If you buy any web hosting from the below button and enter the “000_STARTER_OFFER” coupon code then you will get an extra discount.
Read More: Best Hosting for WordPress

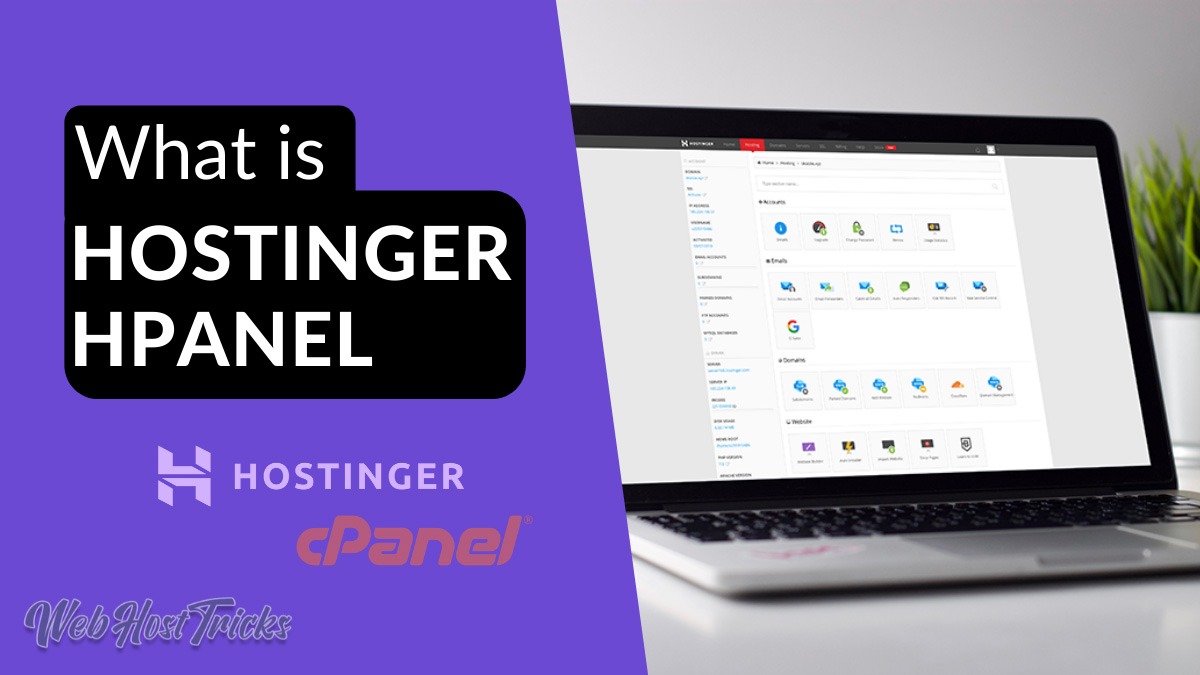
What is Hostinger hPanel
cPanel is a Linux-based GUI used as a web hosting control panel. Every web hosting company provides you access to cPanel that is used to manage your website file or database. Hostinger also provides cPanel that is called Hostinger hPanel.
hPanel is more advance than the other cPanel. hPanel has beautiful and attractive UI, icons and menu. So you can easily manage your website with a good looking interface. You can easily find icons or menus to manage services. Read Complete here
How to access Hostinger hPanel
When you buy any package of Hostinger web hosting and create an account then you can easily log in to your hpanel. Steps are following:
- Visit Hostinger.com
- Click on Login in the Top-Right Corner
- Enter your email and password
- Click on Login or Client Area
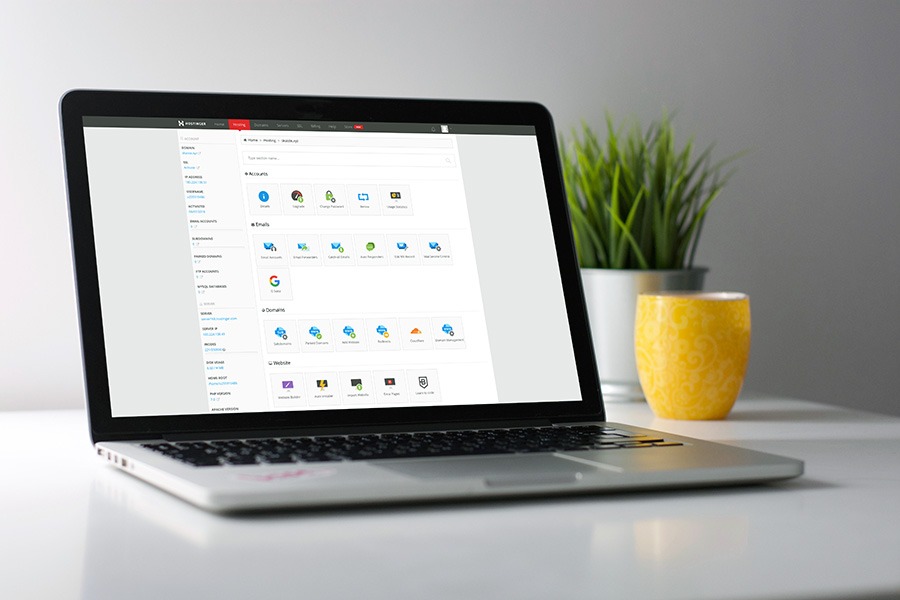
After successful login, you will be redirected to your hPanel that look like the following.
Here is the top menu bar which includes Hosting, Emails, Domains, Server, SSL, Billing, Help and Store Options. In the top right of the menu, you can see the Notification icon and Account icon. In the Bell icon, you can view your notification related to hosting account. Account icon, you can manage your account settings includes Profile, Security, Access Manager, Activity and Logout options.
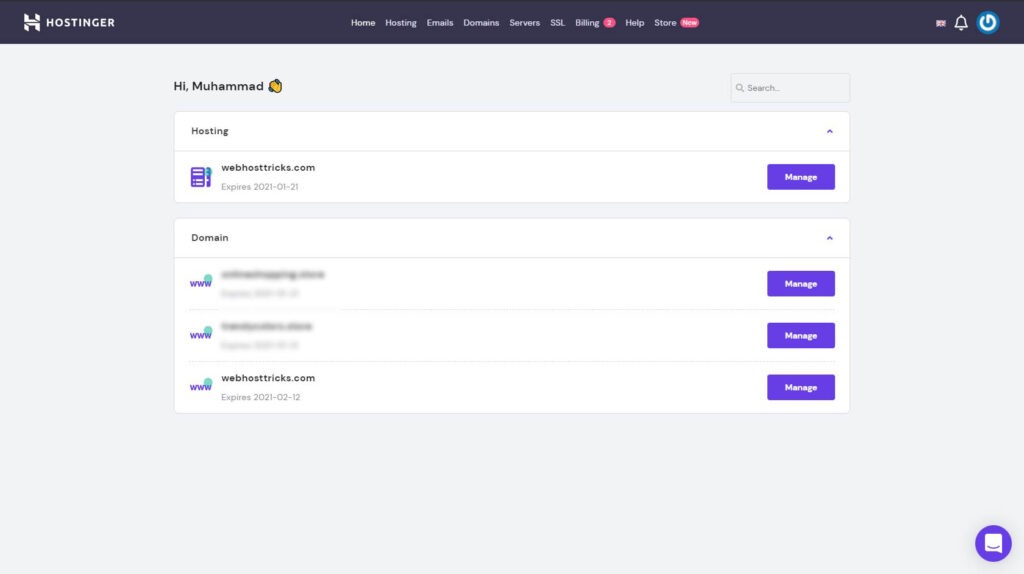
Hostinger hPanel Home
In the hPanel home, you can view your account name and a search box where you can search your hosting or domains. Below the first Section is Hosting, in which you can view your purchased hosting with its expire date. You can manage your Hosting by clicking on the Manage button.
In the second section Domain where you can see the list of domains that you have purchased from the Hostinger. Every domain has a Manage button in front of them so you can easily manage domain separately.
First of all, Let’s dig in the Domain Management. Click on the purple button Manage in front of your domain.
Manage Domains in Hostinger hPanel
When you click on the Manage button in front of your domain name. So you will be redirected to the following page where complete details about your Domain will be shown. All options and settings are explaining below.
In the Left Sidebar name of your Domain is showing that is selected with orange color. You can view the information in the windows and 3 tabs are showing.
Domain Management
In the Domain Management tab, firstly you are seeing the Status of your domain which is showing written in bold font. The Registered and Expire date is showing here. From the Renew Now button, you can renew your domain. You can see the Privacy Protection and Domain Lock option in front. You can order for Privacy Protection means nobody will get information about your name or address that is provided when you buy this domain (WHOIS). Domain Lock means your domain is lock and nobody illegally transfer or register this domain anymore.
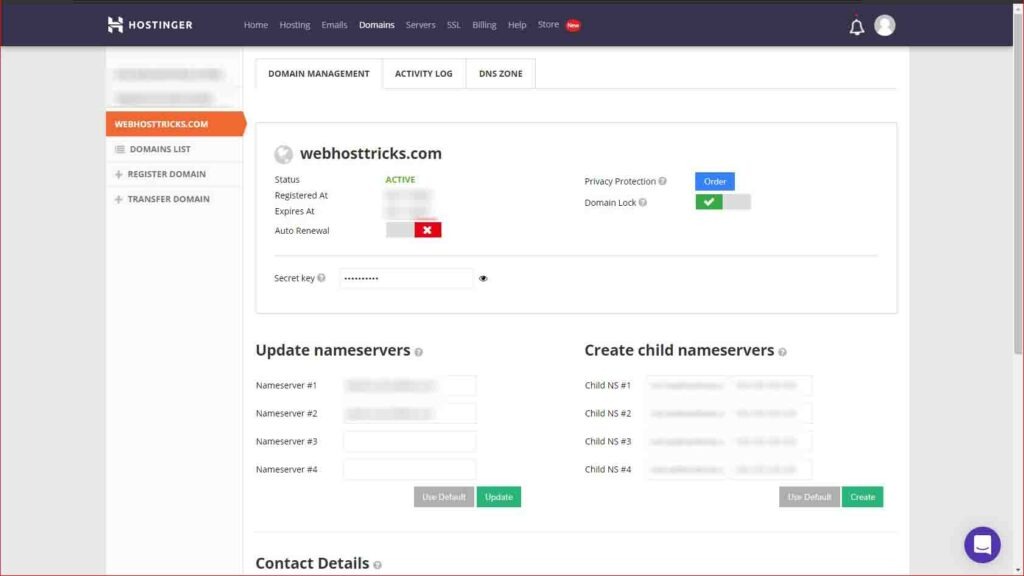
In Update Name Server you can quickly change your DNS name servers and Create Child Name Server. Name server is the server that is used to handle queries regarding your domains. If you want to host this domain to another company then you can update the name server quickly from here. In below Contact Details where your contact details are showing and you can make it private by ordering WHOIS database by clicking the blue Order button.
In the left sidebar, you can see Register Domain and Transfer Domain options. If you want to register a new domain then you click on Register Domain and buy a new domain. In Transfer Domain you can transfer this domain to another company too.
Activity Log: in the activity log you can view all the activities you are performing on your hosting account related to your hosting and domains.
DNS Zone: In this tab, you can briefly get the information about your DNS Servers. This includes A (Host), CNAME, MX (Mail Exchanger), TXT, AAAA, NS (Nameserver), SRV and CAA settings. In the below with the red Reset button, you can reset the settings or values to default.
Manage Hosting in Hosting hPanel
When you click on the Hosting option from the top menu then you get a window that contains the list of your active hosting to Hostinger. Here you can manage, renew or upgrade your hosting and get instant service from Hostinger. You will see a green Add Website button by clicking this you can add a new website to this hosting package.

“You should buy Premium or Business Hosting to host unlimited websites to Hostinger”
How to Add Website in Hostinger Hosting?
You can enter your domain name and password and click on Add so that domain will be added to your hosting account. Now you can manage hosting on this domain by clicking on the green Manage button below in the list of websites. In that, you can click on Auto Installer and select WordPress to install WordPress on your domain. Steps are following:
- Buy a Web Hosting from Hostinger First
- Login to Hostinger hPanel
- Enter Username and Password
- Click on Hosting from Menu Bar
- Click on green Add Website Button
- Enter your Domain and Password
- Click Add
How to Install WordPress on your Domain from Hostinger
After adding the new website then you can install Hostinger on your domain as well (Follow the Above Steps too).
- Click on green Manage button from below list
- Search for Auto Installer
- Click on WordPress
- Enter your Email, Password and other credentials
- In a few seconds, WordPress will install on your Domain
Sidebar
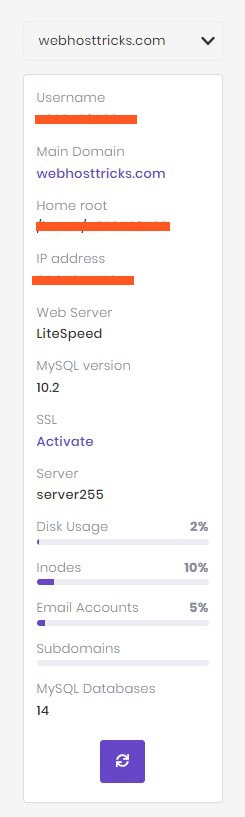
When you click on Manage Hosting in front of your domain name then you will be redirected to a new window which is full of tools. Using these tools, you can easily maintain and manage your website hosting. First of all, you see the sidebar panel which will look like this.
In this sidebar panel you can see the details of the following:
- Hosting username
- Domain name
- Home root
- IP Address
- Web Server
- MySQL version
- SSL
- Server
- Disk Usage
- Inodes
- Email Accounts
- Subdomains
WordPress
In the main window, you will see the WordPress option if WordPress is installed on your domain. When you click on WordPress then you will see a Dashboard and Plugins tabs. In the Dashboard, you can see the details of your Core, Speed and Security, Edit Website, Database, Backup, PHP and WordPress Versions of your website hosting.
In the Plugins tab, you can see the installed plugins. That are installed on your website. You can active or inactive those plugins from here without logging in your WordPress Dashboard easily.

“You can install WordPress by following the above step if you did not yet.”
Order
In the order section, you can view the Order Usage, Renew Hosting, Upgrade and Set Main Domain settings. Order Usage, you will see the performance of CPU, Memory, Requests, Emails, Bandwidth and many other settings show below image.
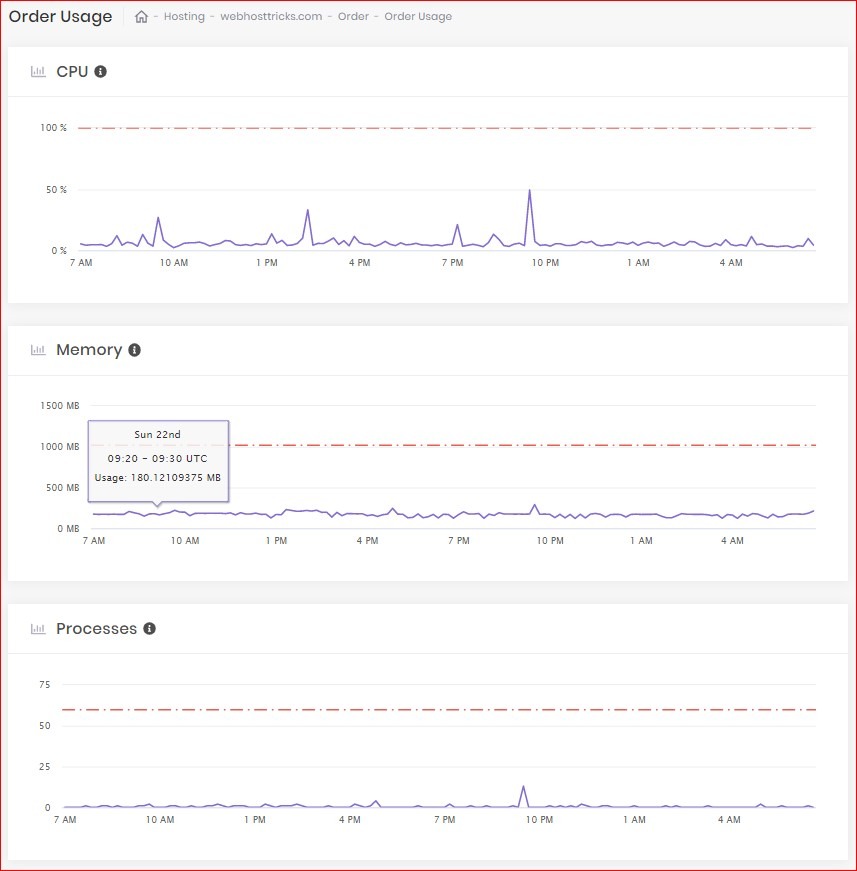
In the Renew and Upgrade option, you can renew and upgrade your hosting plans. All information is available there. In Set Main Domain you can set your domain as your main domain.
Accounts
In the account section, you get Details and Change Password. This is related to your account settings. In the Details, you can see every detail about your Nameserver, Website details, Email details and File Upload details. In Change Password, you can change your web hosting password.
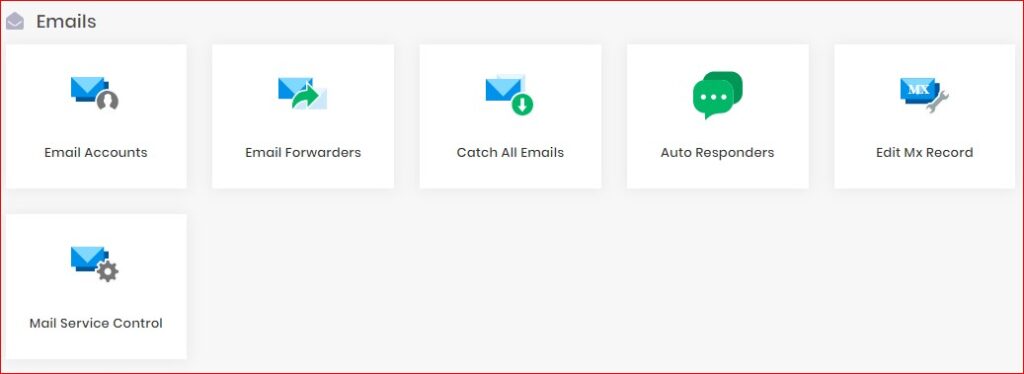
Emails
In the email section, you can manage email settings easily. This includes your Email Account where you can create, edit, delete your emails. In Email Forwards you can setup forward emails to your another email account. Auto Responders help you to manage auto response to the email that received you in your inbox.
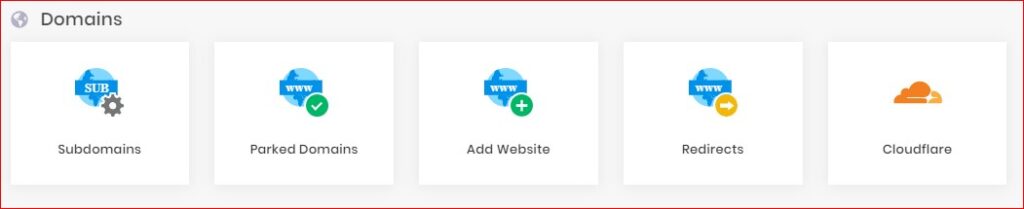
Domain
In Domain Section you can manage your Subdomains, Parked Domains, Add new Domain to your hosting. Also, you can manage domain redirects and Cloudflare settings. With Cloudflare, you can install SSL and forward all your domain Requests to Cloudflare. You can learn how to add a subdomain and parked domain in Hostinger hosting here.
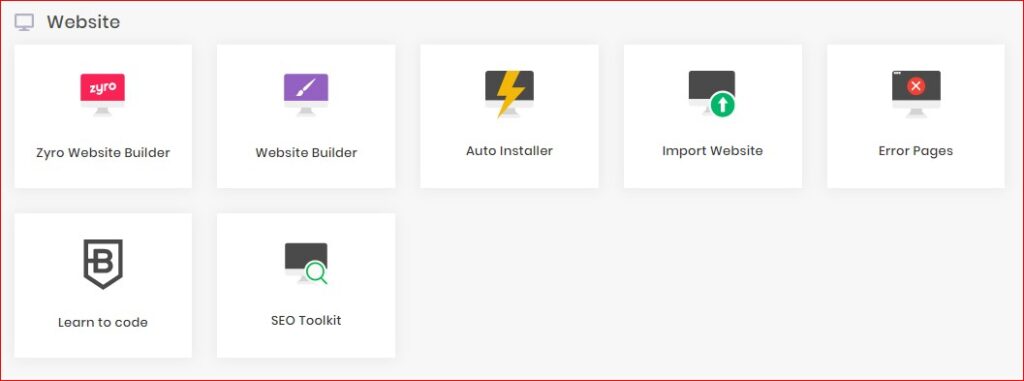
Website
In the Website section, you can manage and build your website and their pages. With Website Builder, you can build your site with Zyro Website Builder provided by Hostinger. In Auto Installer you can instantly install any CMS like WordPress, Joomla, Drupal and many others to your website. Import Website helps you to import your other website to this hosting account. Error Pages are helpful when you got an error on your website and the visitor will see these pages. You can build beautiful error pages here.
Read About: How to Get Best Themes for Blog
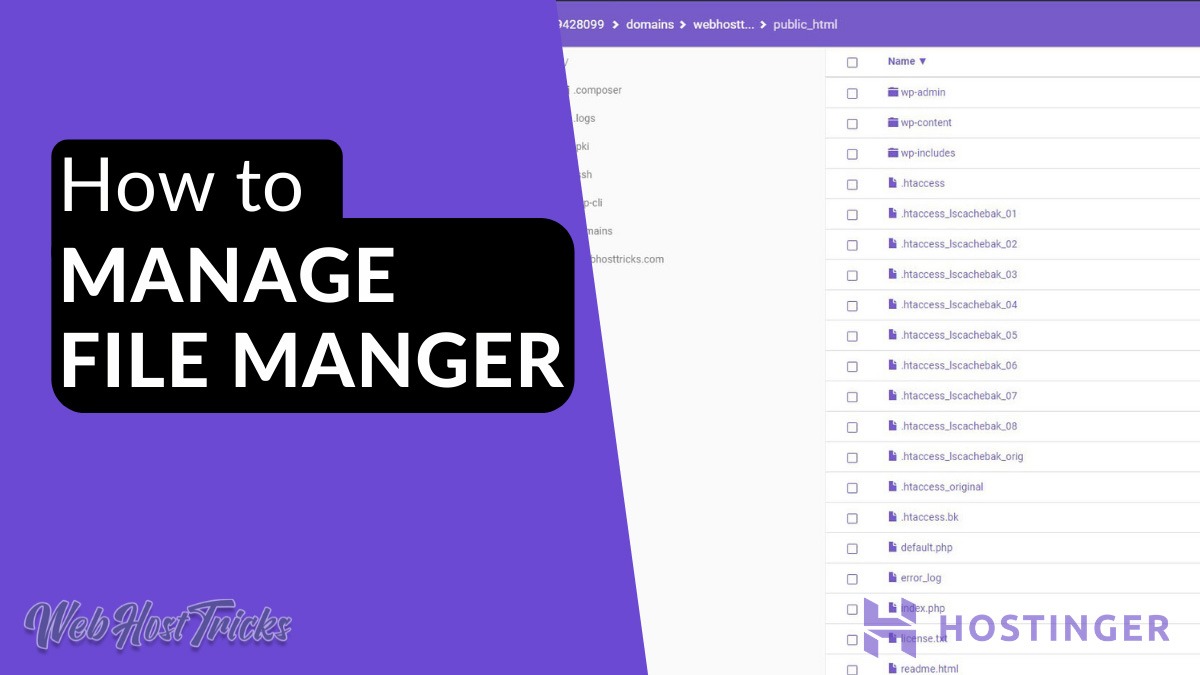
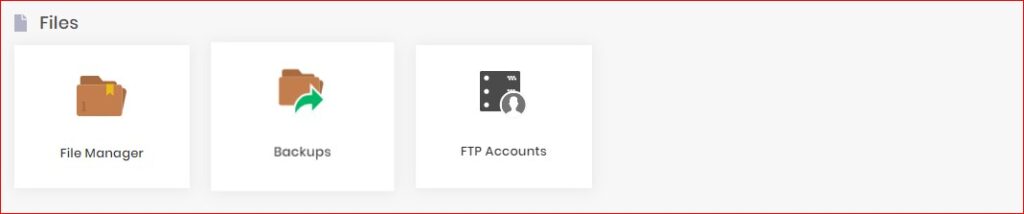
Files
In the files section, you get File Manager which is most important. File Manager, you can view all your website files and manage all of them easily. In Backup, you can see the backups of your website if your hosting plan support backups. You can easily take backup and restore it. In FTP Accounts you can add or remove users that can use or manage your Hostinger hosting.
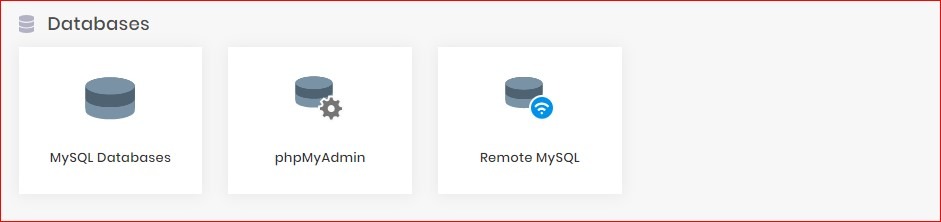
Database
In the database section, you can manage MySQL Database, phpMyAdmin and Remote MySQL. You can easily handle or manage your database, files and folders. Add or delete users for you who can handle your MySQL Database. You can manage your database with phpMyAdmin and also can save your database remotely using Remote MySQL.
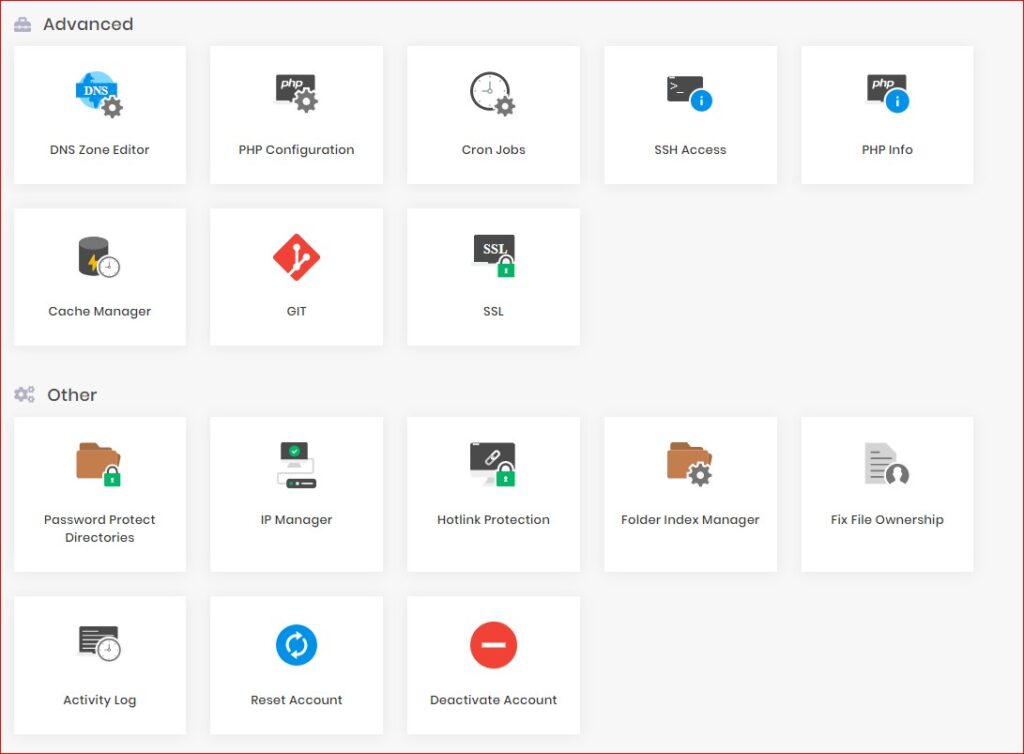
Advanced and Others
In the Advanced section, you can manage your DNS Zone, Cron Jobs, PHP Configuration, SSH Access, Cache Manager, Git and SSL settings. Hostinger provides LiteSpeed plugin which is the best Cache Manager plugin for a website that improves your SEO Ranking.
In Other you can manage Password Protect Directories, IP Manager, Folder Index Manager, Activity Logs, Reset or Deactivate Account.
You can manage your Servers, SSL, Billing Information, Store and Instant Help from Hostinger. There is also a quick Support icon in the Bottom-Right corner so you can connect to Hostinger Support and Help Team.
Closing Remarks
Hostinger is the most Reliable and Cheapest Web Hosting that starts from $0.99/mon and provides exceptional services. It also provides beautiful and good looking hPanel which way better than boring and dull cPanel. So in this article, you can easily understand that how to use Hostinger hPanel. Every step and setting is briefly explained above.
Learn more about Hostinger, WordPress and other How-to Trick here. Follow our Newsletter to get every trick in your email. Please provide your suggestion and feedback by Contact us. You can also like us on Facebook, Twitter, Instagram, YouTube and Pinterest.
Read More: How to Change WordPress Login Page Design